Quantcast
Channel: Use cases – The OTRS Blog
Viewing all 45 articles
Browse latest View live

Encrypt and sign notifications in OTRS via PGP

$
0
0

The Security Toolbox in OTRS allows to decrypt tickets in the backend and to sign and encrypt the notifications. Based on an already running PGP setup in the OTRS installation the following steps are needed:

  • verify that the webserver (apache) is running as OTRS user (usally otrs)
  • verify that the .gnupg directory and content are owned by otrs
  • verify that the public keys of the agents are stored in the keyring
  • create a pgp key pair for the OTRS Notification sender (via gpg –gen-key)

Now lets start the configuration in the Sysconfig:

This will decrypt encrypted mails in the backend, so the content can be used to be analyzed in the Postmaster Filters or as content in the notifications. If needed you can store the decrypted body in the database which would allow fulltext searches on the body.

As next step you have to alter the settings for all notifications you want to sign and/or encrypt. In my system the encryption will be used and notifications to agents without a known key will be supressed.

All notifications will be signed and encrypted. If the original mail was encrypted it will be decrypted and newly encrypted with the keys of the agents.

The post Encrypt and sign notifications in OTRS via PGP appeared first on The OTRS Blog.


How to connect OTRS with GitLab

$
0
0

With the OTRS Business Solution5s, you have the possibility to connect OTRS with GitLab. The following article will explain how to configure the GitLabConnector to establish a connection between OTRS and GitLab.

To complete this Howto, you need a running OTRS & GitLab system. Furthermore, you need a valid user login and the “private_token” of the user which should be used for the integration. The REST/JSON API of GitLab is activated by default.

Use case for this connector

The GitLabConnector can be used in software developing companies, where the customer service team is using OTRS for the requests of customers and the development department is using GitLab for maintaining the source code, work on open issues a.s.o. To improve the communication (and to prevent agents to work on two different systems) you can use the GitLabConnector of this article.

OTRS Requirements for this HowTo

OTRS Framework

  • at least OTRS 5.0.x

OTRS Packages

You need the following Freely selectable Features of the OTRS Business Solution5s :

  • OTRSGenericInterfaceInvokerTicket
(Adds new invoker for TicketCreate and TicketUpdate in the GenericInterface.)
  • OTRSGenericInterfaceInvokerEventFilter
(Contains additional functionalities to add conditions to events of invokers.)

Third Party Software

You need this third party software:

  • XML::Simple
  • XML::LibXML
  • XML::LibXSLT

DynamicFields

  • “GitLabIssueID” of type „TEXT“ to store the GitLab issue id (e.g.: 1)
  • “GitLabProjectID” of type “TEXT” to specify the GitLab project, where the issue should be created (e.g.: 1)
  • “GitLabCreateTime” of type “TEXT” to store the timestamp, when the issue was created
  • “GitLabLastUpdate” of type “TEXT” to store the last update time of the issue in GitLab
  • “GitLabIssueState” of type “TEXT” to store the latest state of the issue from GitLab


Configuring the GitLabConnector in OTRS

After you satisfied the pre-requirements, you’re ready to create a new web service within OTRS. The name of the new web service is “GitLabConnector”. Afterwards, you have to set up the needed invokers.

GitLabConnector General config

Configuring the Invoker “IssueCreate”

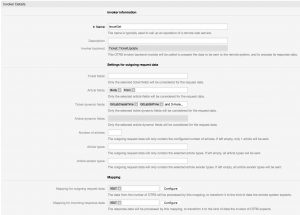
Now you’re ready to start the configuration of our Invokers. To be able to create issues in GitLab, you have to set up an Invoker called “IssueCreate”.  Select all the needed data for your outgoing requests and use “XSLT” as mapping for your outgoing and incoming response data.

GitLabConnector IssueCreate Config1GitLabConnector IssueCreate Config2

For the incoming response data, you have to select the dynamic fields (GitLabIssueID, GitLabCreateTime, GitLabLastUpdate and GitLabIssueState), which you created before.


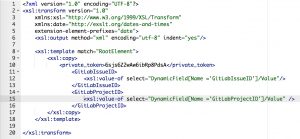
Now you can configure your outgoing XSLT-mapping. If you need a working XSLT-mapping, you can use the following example:

GitLabConnector IssueCreate OutgoingXSLT

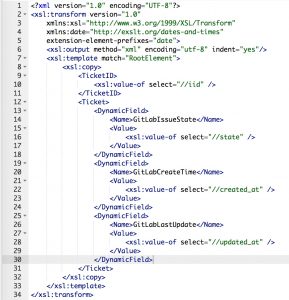
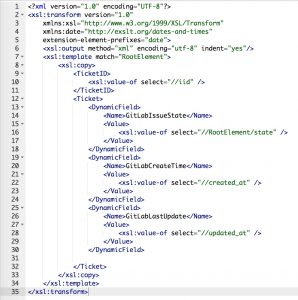
You also need a XSLT-mapping for the incoming response data, because you have to store the GitLab Issue ID,  the Create Time the Last Update Time and the GitLab Issue State:

GitLabConnector IssueCreate IncomingXSLT

OTRS stores the GitLab Issue ID in the dynamic field “GitLabIssueID”. Afterward, it’s shown in the OTRS TicketZoom.

Furthermore, we want to know the latest State of the GitLab Issue, that’s the reason why it’s also stored in a dynamic field

The used “Event trigger” is the last point for this invoker. Just select one and you’re done with the first Invoker.

Configuring the Invoker “IssueGet”

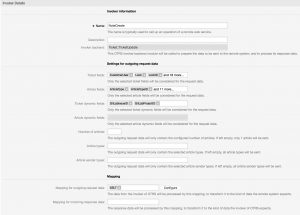
The next invoker is “IssueGet”.  Select all the needed data for your outgoing requests (please don’t forget the dynamic field “GitLabIssueID” in the “Ticket dynamic fields” dropdown) and use “XSLT” as a mapping for your outgoing data.

GitLabConnector IssueGet Config1GitLabConnector IssueGet Config 2

As outgoing XSLT-mapping, you can use my example. I will transmit the Issue ID to GitLab because I want to get the latest Issue state.

GitLabConnector IssueGet OutgoingXSLT

A mapping for the incoming response data is necessary because we want to store the “LastUpdate” timestamp and the latest Issue state.

GitLabConnector IssueGet ncomingXSLT

The used “Event Trigger” is the last point for this Invoker. Just select one and you’re done with the second Invoker. In my example, I’m using a dynamic field update, which is automatically set by a GenericAgent.


Configuring the Invoker “NoteCreate”

The next invoker is “NoteCreate”.  Select all the needed data for your outgoing requests (please don’t forget the dynamic field “GitLabIssueID” in the “Ticket dynamic fields” dropdown) and use “XSLT” as a mapping for your outgoing data.

GitLabConnector NoteCreate Config1GitLabConnector NoteCreate Config2

Use my example as outgoing XSLT-mapping:

GitLabConnector NoteCreate OutgoingXSLT

You don’t need a mapping for the incoming response data.

The used “Event trigger” is the last point. Select one and you’re done with the last Invoker of my tutorial. In my example I’m using an ArticleCreate event in OTRS, to trigger the Invoker.


Configuring the GitLabConnector “Network Transport”


Requester configuration

It’s necessary to configure the network transport for the Invokers because we’ve to use the right requests commands towards GitLab.Otherwise, we’ll receive errors. It’s quite easy as you can see:

GitLabConnector TransportConfig

We don’t have to use an authentication module because we’re using the private token of a specific user in our mapping.

Afterward just click on “Save and finish”.

Testing the GitLabConnector

Testing the Requester

Create or take an already existing ticket and trigger the “IssueCreate” Invoker.

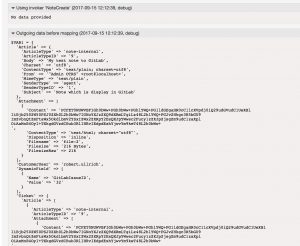
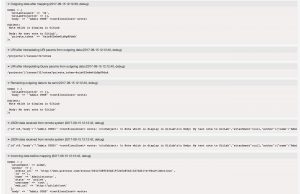
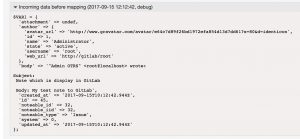
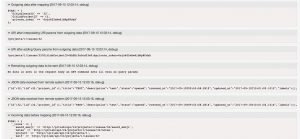
As result you should see something similar in the OTRS Debugger:

GitLabConnector IssueCreate Debugger 1GitLabConnector IssueCreate Debugger 2GitLabConnector IssueCreate Debugger 3

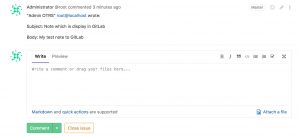
In GitLab a new issue was created:

GitLabConnector IssueCreate GitLab

If we now trigger the Invoker “IssueGet” we’ll see the following in the Debugger:

GitLabConnector IssueGet Debugger 1GitLabConnector IssueGet Debugger 2

OTRS is now requesting everything from GitLab for a specific issue and is mapping the data into our dynamic fields:

GitLabConnector IssueGet Debugger 3

You’ll now see the following information in the TicketZoom:

GitLabConnector IssueGet TicketZoom

And the last the Invoker is “NoteCreate”:

GitLabConnector NoteCreate Debugger 1GitLabConnector NoteCreate Debugger 2GitLabConnector NoteCreate Debugger 3

You can now see that the Note was created in GitLab:

GitLabConnector NoteCreate GitLab

More information about the GitLab API

You can also use other resources which are provided by the GitLab API.

If you need more information, please go to the following website: https://docs.gitlab.com/ee/api/README.html

The post How to connect OTRS with GitLab appeared first on The OTRS Blog.

How to connect OTRS with GitHub

$
0
0

Last time I had a requirement of a customer, who wants to connect OTRS with the GitHub account of the company. Because I think this might be also an interesting Use Case for you, I’m writing this small blog article and show you, how to create an issue in GitHub via OTRS, to receive the latest information of a GitHub issue and to create comments for an issue in GitHub.

To complete this Howto, you need a running OTRS & a valid GitHub repository. Furthermore, you need a valid user login and the “access_token” of the user which should be used for the integration. The REST/JSON API of GitHub can be used by everyone, who has a GitHub account.

Usecase for this connector

The GitHubConnector can be used in software developing companies, where the customer service team is using OTRS for the requests of customers and the development department is using GitHub for maintaining the source code, work on open issues a.s.o. To improve the communication (and to prevent agents to work in two different systems) you can use the GitHubConnector of this article.

OTRS Requirements for this HowTo

OTRS Framework

  • at least OTRS 5.0.x

OTRS Packages

You need the following Freely selectable Features of the OTRS Business Solution5s :

  • OTRSGenericInterfaceInvokerTicket
(Adds new invoker for TicketCreate and TicketUpdate in the GenericInterface.)
  • OTRSGenericInterfaceInvokerEventFilter
(Contains additional functionalities to add conditions to events of invokers.)

Third Party Software

You need this third party software:

  • XML::Simple
  • XML::LibXML
  • XML::LibXSLT

DynamicFields

  • “GitHubIssueID” of type „TEXT“ to store the GitHub issue id (e.g.: 1)
  • “GitHubCreateTime” of type “TEXT” to store the timestamp, when the issue was created
  • “GitHubUpdateTime” of type “TEXT” to store the last update time of the issue in GitHub
  • “GitHubIssueState” of type “TEXT” to store the latest state of the issue from GitHub


Configuring the GitHubConnector in OTRS

After you satisfied the pre-requirements, you’re ready to create a new web service within OTRS. The name of the new web service is “GitHubConnector”. Afterwards, you have to set up the needed invokers.

GitHubConnector General config

Configuring the Invoker “IssueCreate”

Now you’re ready to start the configuration of our Invokers. To be able to create issues in Github, you have to set up an Invoker called “IssueCreate”.  Select all the needed data for your outgoing requests and use “XSLT” as mapping for your outgoing and incoming response data.

GitHubConnector IssueCreate Config 1

For the incoming response data, you have to select the dynamic fields (GitHubIssueID, GitHubCreateTime, GitHubLastUpdate and GitHubIssueState), which you created before.

GitHubConnector IssueCreate Config 2

For our XSLT mapping we need at least the following elements:

Name Type Description
title string Required. The title of the issue.
body string The contents of the issue.

Now you can configure your outgoing XSLT-mapping. If you need a working XSLT-mapping, you can use the following example:

GitHubConnector IssueCreate OutgoingXSLT

You also need a XSLT-mapping for the incoming response data, because you have to store the GitHub Issue ID,  the Create Time the Last Update Time and the GitHub Issue State:

GitHubConnector IssueCreate IncomingXSLT

OTRS stores the GitHub Issue ID in the dynamic field “GitHubIssueID”. Afterward, it’s shown in the OTRS TicketZoom.

Furthermore, we want to know the latest State of the GitHub Issue, that’s the reason why it’s also stored in a dynamic field

The used “Event trigger” is the last point for this invoker. Just select one and you’re done with the first Invoker.

Configuring the Invoker “IssueGet”

The next invoker is “IssueGet”.  Select all the needed data for your outgoing requests (please don’t forget the dynamic field “GitHubIssueID” in the “Ticket dynamic fields” dropdown) and use “XSLT” as a mapping for your outgoing data.

GitHubConnector IssueGet Config 1 GitHubConnector IssueGet Config 2

As outgoing XSLT-mapping, you can use my example. I will transmit the Issue ID to GitHub, because I want to get the latest Issue state.

GitHubConnector IssueGet OutgoingXSLT

A mapping for the incoming response data is necessary, because we want to store the “LastUpdate” timestamp and the latest Issue state.

GitHubConnector IssueGet IncomingXSLT

The used “Event Trigger” is the last point for this Invoker. Just select one and you’re done with the second Invoker. In my example I’m using a dynamic field update, which is automatically set by a GenericAgent.


Configuring the Invoker “NoteCreate”

The next invoker is “NoteCreate”.  Select all the needed data for your outgoing requests (please don’t forget the dynamic field “GitHubIssueID” in the “Ticket dynamic fields” dropdown) and use “XSLT” as a mapping for your outgoing data.

GitHubConnector NoteCreate Config 1 GitHubConnector NoteCreate Config 2

Use my example as outgoing XSLT-mapping:

GitHubConnector NoteCreate OutgoingXSLT

You don’t need a mapping for the incoming response data.

The used “Event trigger” is the last point. Select one and you’re done with the last Invoker of my tutorial. In my example I’m using an ArticleCreate event in OTRS, to trigger the Invoker.


Configuring the GitHubConnector “Network Transport”


Requester configuration

It’s necessary to configure the network transport for the Invokers because we’ve to use the right requests commands towards GitHub.Otherwise we’ll receive errors. It’s quite easy as you can see:

GitHubConnector Transport Config

We don’t have to use an authentication module, because we’re using the acces token of a specific user in our mapping.

Afterward just click on “Save and finish”.

Testing the GitHubConnector

Testing the Requester

Create or take an already existing ticket and trigger the “IssueCreate” Invoker.

As result you should see something similar in the OTRS Debugger:

GitHubConnector IssueCreate Debugger 1 GitHubConnector IssueCreate Debugger 2 GitHubConnector IssueCreate Debugger 3

In GitHub a new issue was created:

GitHubConnector IssueCreate Github

If we now trigger the Invoker “IssueGet” we’ll see the following in the Debugger:

GitHubConnector IssueGet Debugger 1 GitHubConnector IssueGet Debugger 2

OTRS is now requesting everything from GitHub for a specific issue and is mapping the data into our dynamic fields:

GitHubConnector IssueGet Debugger 3

You’ll now see the following information in the TicketZoom:

GitHubConnector IssueGet TicketZoom

And the last the Invoker is “NoteCreate”:

GitHubConnector NoteCreate Debugger 1 GitHubConnector NoteCreate Debugger 2 GitHubConnector NoteCreate Debugger 3

You can now see that the Note was created in GitHub:

GitHubConnector NoteCreate Github

More information about the GitHub API

You can also use other resources which are provided by the GitHub API.

If you need more information, please go to the following website: https://developer.github.com/v3/

The post How to connect OTRS with GitHub appeared first on The OTRS Blog.

How to connect OTRS with Alfresco (Part 1)

$
0
0

Because I need a new challenge every month, I thought about an integration between OTRS and Alfresco to store documents, which are sent to customers via OTRS, also in Alfresco. I call this integration AlfrescoConnector. Because this integration will become very complex, I’ll split this how-to into several blog articles, which will be released regularly. In this article, I’ll show you how to create, delete sites and how to create, delete folders in Alfresco.

To complete this how-to, you need at first a running OTRS and an Alfresco system. For some operations, you need special privileges in Alfresco (e.g. administrator privileges). The REST/JSON API of Alfresco is activated by default.

Use case for this connector

The AlfrescoConnector can be useful in companies who are sending documents to their customers via OTRS and have to upload them to Alfresco. To improve this workflow and to prevent agents of manually uploading documents to Alfresco, you can use the connector if this article.

OTRS Requirements for this How-To

OTRS Framework

  • at least OTRS 5.0.x

OTRS Packages

You need the following Freely selectable Features of the OTRS Business Solution5s :

  • OTRSGenericInterfaceInvokerTicket
(Adds new invoker for TicketCreate and TicketUpdate in the GenericInterface.)
  • OTRSGenericInterfaceInvokerEventFilter
(Contains additional functionalities to add conditions to events of invokers.)

Third Party Software

You need this third-party software:

  • XML::Simple
  • XML::LibXML
  • XML::LibXSLT

DynamicFields

  • “AlfrescoSiteID” of type „TEXT“ to store the id of a site (e.g.: 1)
  • “AlfrescoSiteName” of type “TEXT”
  • “AlfrescoSiteVisibility” of type “DROPDOWN” with the following values:
    • PRIVATE: PRIVATE
    • PUBLIC:PUBLIC
  • “AlfrescoFolderName” of type “TEXT”
  • “AlfrescoFolderID” of type “TEXT” to store the id of a folder

Configuring the AlfrescoConnector in OTRS

Now we can start with the configuration. The name of the new web service is “AlfrescoConnector”. Afterwards, you have to set up the needed invokers.

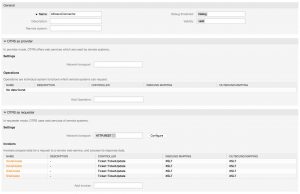
AlfrescoConnector General Configuration

Configuring the Invoker “SiteCreate”

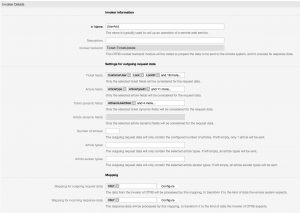
Now you’re ready to start the configuration of the Invokers. At first, we’ll create an Invoker for adding new sites to Alfresco. Set up an Invoker called “SiteCreate” and select all the needed data for your outgoing requests and use “XSLT” as mapping for your outgoing and incoming response data.

AlfrescoConnector Invoker SiteCreate

For the incoming response data, you have to select the dynamic field “SiteID”, which you created before.

AlfrescoConnector Invoker SiteCreate1

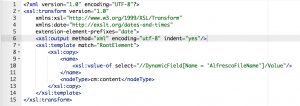
Now you can configure your outgoing XSLT-mapping. If you need a working XSLT-mapping, you can use the following example:

AlfrescoConnector Invoker SiteCreate Outgoing Mapping

You also need a XSLT-mapping for the incoming response data, because you have to store the Site ID:

AlfrescoConnector Invoker SiteCreate Incoming Mapping

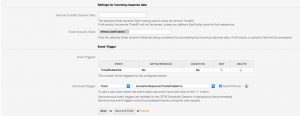
The used “Event trigger” is the last point for this invoker. Just select one and you’re done with the first Invoker.

Configuring the Invoker “SiteDelete”

The next invoker is “SiteDelete”.  Select all the needed data for your outgoing requests (please don’t forget the dynamic field “AlfrescoSiteID” in the “Ticket dynamic fields” drop-down) and use “XSLT” as a mapping for your outgoing data.

AlfrescoConnector Invoker SiteDelete

As outgoing XSLT-mapping, you can use my example.

AlfrescoConnector Invoker SiteDelete Outgoing Mapping

A mapping for the incoming response data is not necessary because Alfresco sends an empty response.

The used “Event Trigger” is the last point for this Invoker. Just select one and you’re done with the second Invoker. In my example, I’m using a “TicketSubscribe” Event.

AlfrescoConnector Invoker SiteDelete 1

Configuring the Invoker “NodeCreate”

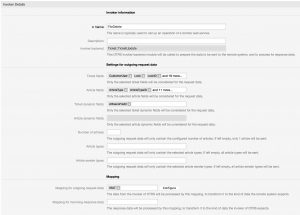
The next Invoker is “NodeCreate”.  Select all the needed data for your outgoing requests and use “XSLT” as a mapping for your outgoing request and incoming response data.

Use my example as outgoing XSLT-mapping:

AlfrescoConnector Invoker NodeCreate Outgoing Mapping

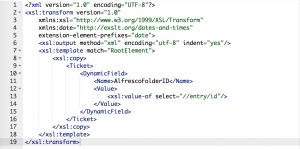
Furthermore, we want to store the NodeID of the response, for that reason we have to use the following mapping for incoming response data:

AlfrescoConnector Invoker NodeCreate Incoming MappingThis mapping stores the NodeID in the dynamic field “AlfrescoFolderID”.

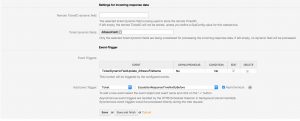
The  “Event trigger” is the last point. Select one and you’re done with the next Invoker.

AlfrescoConnector Invoker NodeCreate General Configuration 1

Configuring the Invoker “NodeDelete”

The next invoker is “NodeDelete”.  Select all the needed data for your outgoing requests (please don’t forget the dynamic field “AlfrescoFolderID” in the “Ticket dynamic fields” drop-down) and use “XSLT” as a mapping for your outgoing data.

Use my example as outgoing XSLT-mapping:

Because the answer is empty if it was successful, you don’t need a mapping for the incoming response data.

The used “Event trigger” is the last point. Select a trigger of your choice and you’re done with the last Invoker of my tutorial.

AlfrescoConnector Invoker NodeDelete General Configuration 1

Configuring the AlfrescoConnector “Network Transport”

Requester configuration

It’s necessary to configure the network transport for the Invokers because we’ve to use the right requests commands towards Alfresco. Otherwise, we’ll receive errors. It’s quite easy as you can see:

AlfrescoConnector Transport_Configuration

Please select “BasicAuth” for authentication and use a valid user.

Afterward just click on “Save and finish”.

Next time

In the next blog article for the AlfrescoConnector, I’ll show you how to create files and additional users in Alfresco.

More information about the Alfresco API

You can also use other resources which are provided by the Alfresco API.

If you need more information, please go to the following website: https://api-explorer.alfresco.com/api-explorer/

The post How to connect OTRS with Alfresco (Part 1) appeared first on The OTRS Blog.
How to connect OTRS with Alfresco (Part 2)

$
0
0

Let’s continue with our AlfrescoConnector. Last time I showed you how to manage sites and folders in Alfresco. Today I will show you how to create files and additional users and how to modify them

To complete this how-to, you need at first a running OTRS and an Alfresco system. For some operations, you need special privileges in Alfresco (e.g. administrator privileges). The REST/JSON API of Alfresco is activated by default.

Use case for this connector

Probably you already know Alfresco. It’s one of the best Open Source document management system. The AlfrescoConnector can be useful in companies who are sending documents to their customers via OTRS and have to upload them to Alfresco. To improve this workflow and to prevent agents of manually uploading documents to Alfresco, you can use the connector if this article.

OTRS Requirements for this HowTo

OTRS Framework

  • at least OTRS 5.0.x

OTRS Packages

You need the following Freely selectable Features of the OTRS Business Solution5s :

  • OTRSGenericInterfaceInvokerTicket
(Adds new invoker for TicketCreate and TicketUpdate in the GenericInterface.)
  • OTRSGenericInterfaceInvokerEventFilter
(Contains additional functionalities to add conditions to events of invokers.)

Third Party Software

You need this third-party software:

  • XML::Simple
  • XML::LibXML
  • XML::LibXSLT

DynamicFields

The following dynamic fields should be added because they’re required by Alfresco

  • “AlfrescoUserID” of type “TEXT” to specify the login of the new user
  • “AlfrescoUserFirstName” of type “TEXT” for the first name of the new user
  • “AlfrescoUserLastName” of type “TEXT” for the last name of the new user
  • “AlfrescoUserEMail” of type “TEXT” to specify a valid E-Mail address
  • “AlfrescoUserInitialPassword” of type “TEXT” for the initial password
  • “AlfrescoUserEnabled” of type “DROPDOWN” to store the response of Alfresco
    • please use the following values:
      • true: true
      • false: false
  • “AlfrescoFileName” of type “TEXT”
  • “AlfrescoFileID” of type “TEXT” to store the file id of the response

Web service

In addition, part 1 of the AlfrescoConnector might be useful. You’ll find the first blog article here.

Configuring the AlfrescoConnector in OTRS

Now we can continue with the configuration of the web service. If you skipped the first article, please create a new web service called “AlfrescoConnector”. Afterwards, you have to set up the needed invokers.

AlfrescoConnector General Configuration

Configuring the Invoker “UserAdd”

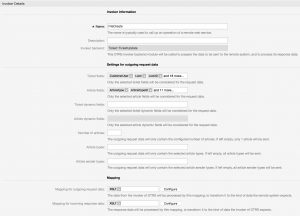
Now you’re ready to start the configuration of the Invokers. At first, we’ll create an Invoker for adding new sites to Alfresco. Set up an Invoker called “UserCreate” and select all the needed data for your outgoing requests and use “XSLT” as mapping for your outgoing and incoming response data.

AlfrescoConnector UserAdd Configuration 1

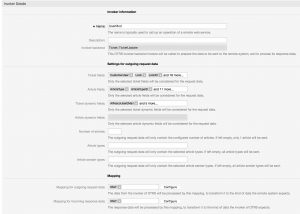
For the incoming response data, you have to select the dynamic field “AlfrescoUserEnabled”, which you created before.

AlfrescoConnector UserAdd Configuration 2

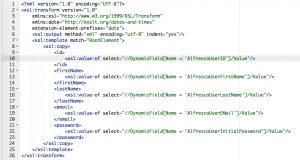
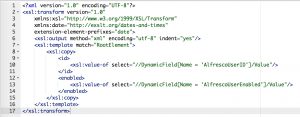
Now you can configure your outgoing XSLT-mapping. If you need a working XSLT-mapping, you can use the following example:

AlfrescoConnector UserAdd Outbound Mapping

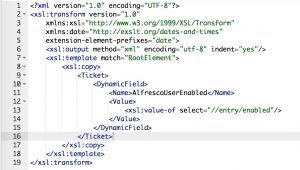
You also need a XSLT-mapping for the incoming response data, because we want to store the user ID:

AlfrescoConnector UserAdd MappingInbound

The used “Event trigger” is the last point for this invoker. Just select one and you’re done with the first Invoker.

Configuring the Invoker “UserMod”

The next invoker is “UserMod”.  Select all the needed data for your outgoing requests (please don’t forget the dynamic fields “AlfrescoUserID” & “AlfrescoUserEnabled in the “Ticket dynamic fields” drop-down) and use “XSLT” as a mapping for your outgoing data.

AlfrescoConnector UserMod Configuration 1

As outgoing XSLT-mapping, you can use my example.

AlfrescoConnector UserMod Mapping

A mapping for the incoming response data is not necessary because Alfresco sends an empty response.

The used “Event Trigger” is the last point for this Invoker. Just select one and you’re done with the second Invoker. In my example, I’m using a “TicketUnsubscribe” Event.

AlfrescoConnector UserMod Configuration 2

Configuring the Invoker “FileCreate”

The next Invoker is “FileCreate”.  Select all the needed data for your outgoing requests and use “XSLT” as a mapping for your outgoing request and incoming response data.

AlfrescoConnector FileCreate Configuration 1

Use my example as outgoing XSLT-mapping:

AlfrescoConnector FileCreate Mapping

Furthermore, we want to store the FileID of the response, for that reason we have to use the following mapping for incoming response data:

AlfrescoConnector FileCreate InboundMapping

This mapping stores the FileID in the dynamic field “AlfrescoFileID”.

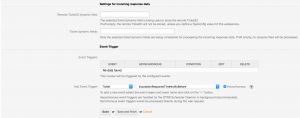
The last point for this Invoker is the  “Event trigger”. Select one and you’re done with the next Invoker.

AlfrescoConnector FileCreate Configuration 2

Configuring the Invoker “FileDelete”

The last Invoker for today is “FileDelete”.  Select all the needed data for your outgoing requests (please don’t forget the dynamic field “AlfrescoFileID” in the “Ticket dynamic fields” drop-down) and use “XSLT” as a mapping for your outgoing data.

AlfrescoConnector FileDelete Configuration 1

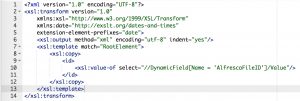
Use my example as outgoing XSLT-mapping:

AlfrescoConnector FileDelete Mapping

Because the answer is empty if it was successful, you don’t need a mapping for the incoming response data.

Furthermore, you need an “Event trigger”. Select a trigger of your choice and you’re done with the last Invoker of my tutorial.

Configuring the AlfrescoConnector “Network Transport”

Requester configuration

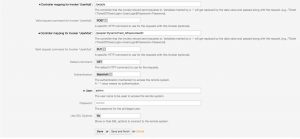
Furthermore, it’s necessary to configure the network transport for the Invokers because we’ve to use the right requests commands towards Alfresco. Otherwise, we’ll receive errors. It’s quite easy as you can see:

AlfrescoConnector Transport Configuration 1AlfrescoConnector Transport Configuration 2

Please select “BasicAuth” for authentication and use a valid user.

Afterward just click on “Save and finish”.


Other AlfrescoConnector articles

Part 1 – Manage sites and folders – https://blog.otrs.com/2017/10/06/alfrescoconnector-part1/

Next time

In the next blog article for the AlfrescoConnector, I’ll show you how to upload files from OTRS to Alfresco via CMIS API.

More information about the Alfresco API

You can also use other resources which are provided by the Alfresco API.

If you need more information, please go to the following website: https://api-explorer.alfresco.com/api-explorer/

The post How to connect OTRS with Alfresco (Part 2) appeared first on The OTRS Blog.
HowTo: Connect OTRS with Icinga2 – Part 1

$
0
0

I think this might be an interesting use case for you if you have established a Release & Deployment management process in your OTRS system and if you want to create automatical a new host in your Icinga2 monitoring system. In this small blog article, I’ll show you, how to create a web service between OTRS and Icinga2. I’ll call this integration “Icinga2Connector”.

Like in former blog posts, there are several requirements for this HowTo:

  • running OTRS 6.0.x system
  • running Icinga2 system with enabled API & user credentials

OTRS Requirements for this HowTo

OTRS Framework

  • at least OTRS 6.0.x

OTRS Packages

You need the following Freely selectable Features of the OTRS Business Solution™ 6 :

  • OTRSTicketInvoker
(Adds new invoker for TicketCreate and TicketUpdate in the GenericInterface.)

Third Party Software

You need this third-party software:

  • XML::Simple
  • XML::LibXML
  • XML::LibXSLT

DynamicFields

The following dynamic fields should be added because they’re required for this integration.

  • “Icinga2Hostname” of type “TEXT” to specify the name of the new Icinga2 host
  • “Icinga2Address” of type “TEXT” to specify the login of the new user
  • “Icinga2Command” of type “Dropdown” to specify the check command in Icinga2. Please use the following values:
    • hostalive: hostalive
    • http: http
    • ping4: ping4

Web service

In addition, the CMDBConnector might be useful, if you want to store the deployed item in the OTRS CMDB. You’ll find this blog article here.

Configuring the Icinga2Connector in OTRS

After you satisfied the pre-requirements, you’re ready to create a new web service within OTRS. The name of the new web service is “Icinga2Connector”. Afterward, you have to set up the needed invokers.

Icinga2Connector general config

Configuring the Invoker “CreateHost”

Now you’re ready to start the configuration of our Invokers. To be able to create a new host in Icinga2, you have to set up an Invoker called “CreateHost”.  Select all the needed data for your outgoing requests and use “XSLT” as mapping for your outgoing data.

Icinga2Connector invoker config

For our XSLT mapping we need the following elements:

  • the hostname, which should be displayed in Icinga2 (dynamic field “Icinga2Hostname”)
  • the IP address of the new host (dynamic field “Icinga2Address”)
  • the used Icinga check (dynamic field “Icinga2Command”)

Now you can configure your outgoing XSLT-mapping. If you need a working XSLT-mapping, you can use the following example:

Icinga2Connector xslt mapping

The used “Event trigger” is the last point for this invoker. Just select one and you’re done with the Invoker.


Configuring the Icinga2Connector “Network Transport”

Requester configuration

It’s necessary to configure the network transport for the invoker because we’ve to use the right requests commands towards Icinga2. Otherwise, we’ll receive errors. It’s quite easy as you can see:

Icinga2Connector transport config

As authentication module please use HTTP basic auth and fill in the user credentials of the Icinga2 API user. Afterward just click on “Save and finish”.

Testing the Icinga2Connector

Testing the Requester

Create or take an already existing ticket and trigger the “CreateHost” invoker.

As result you should see something similar in the OTRS Debugger:

Icinga2Connector debugger

In Icinga2 a new host is added:

Icinga2Connector icinga2 result

Stay tuned…

Next time I’ll show you other useful examples how you could integrate OTRS with Icinga2.

More information about the Icinga2 API

You can also use other resources which are provided by the Icinga2 API.

Please go to the following website, if you need more information: https://www.icinga.com/docs/icinga2/latest/doc/12-icinga2-api/


The post HowTo: Connect OTRS with Icinga2 – Part 1 appeared first on The OTRS Blog.

HowTo: Connect OTRS with Icinga2 – Part 2

$
0
0

Let’s continue with our Icinga2Connector. Last time I showed you how to create a new host in Icinga2 via API. Today I will show you how to modify hosts. To complete this how-to, you need at first a running OTRS and an Icinga2 system.

Use case for this connector

If you have a Release & Deployment management process in your OTRS system and you want to transmit information automatical to Icinga2. In this small blog article, I’ll show you, how to create a web service between OTRS and Icinga2. I’ll call this integration “Icinga2Connector”.

OTRS Requirements for this HowTo

OTRS Framework

  • at least OTRS 6.0.x

OTRS Packages

You need the following Freely selectable Features of the OTRS Business Solution™ 6 :

  • OTRSTicketInvoker
(Adds new invoker for TicketCreate and TicketUpdate in the GenericInterface.)

Third Party Software

You need this third-party software:

  • XML::Simple
  • XML::LibXML
  • XML::LibXSLT

DynamicFields

  • “Icinga2Hostname” of type “TEXT” to specify the name of the new Icinga2 host
  • “Icinga2Address” of type “TEXT” to specify the login of the new user
  • “Icinga2Command” of type “Dropdown” to specify the check command in Icinga2. Please use the following values:
    • hostalive: hostalive
    • http: http
    • ping4: ping4
  • “Icinga2OS” of type “Dropdown” to specify the Host OS. Use the following values:
    • Linux: Linux
    • Windows: Windows

Web service

In addition, part 1 of the Icinga2Connector might be useful. You’ll find the first blog article here.

Configuring the Invoker “UpdateHost”

Now we’re ready to start the configuration of our next Invoker. Create a new Invoker called “UpdateHost”.  Select all the needed data for your outgoing requests and use “XSLT” as mapping for your outgoing data.

Icinga2Connector_UpdateHost_InvokerConfig1Icinga2Connector_UpdateHost_InvokerConfig2

For our XSLT mapping we need the following elements:

  • the hostname, which should be displayed in Icinga2 (dynamic field “Icinga2Hostname”)
  • the IP address of the new host (dynamic field “Icinga2Address”)
  • the used Icinga check (dynamic field “Icinga2Command”)
  • the OS of the Host (dynamic field “Icinga2OS”)

Now you can configure your outgoing XSLT-mapping. If you need a working XSLT-mapping, you can use the following example:

Icinga2Connector UpdateHost XSLT mapping

The used “Event trigger” is the last point for this invoker. Just select one and you’re done with the Invoker.


Configuring the Icinga2Connector “Network Transport”

Requester configuration

It’s necessary to configure the network transport for the invoker because we’ve to use the right requests commands towards Icinga2. Otherwise, we’ll receive errors. It’s quite easy as you can see:

Icinga2Connector_UpdateHost Transport Config

As authentication module please use HTTP basic auth and fill in the user credentials of the Icinga2 API user. Afterward just click on “Save and finish”.

Testing the Icinga2Connector

Testing the Requester

Create or take an already existing ticket and trigger the “UpdateHost” invoker.

As result you should see something similar in the OTRS Debugger:

Icinga2Connector UpdateHost Debugger

In Icinga2 a the host is updated:

Icinga2Connector UpdateHost Icinga2GUI

Stay tuned…

Next time I’ll show you other useful examples how you could integrate OTRS with Icinga2.

More information about the Icinga2 API

You can also use other resources which are provided by the Icinga2 API.

Please go to the following website, if you need more information: https://www.icinga.com/docs/icinga2/latest/doc/12-icinga2-api/

The post HowTo: Connect OTRS with Icinga2 – Part 2 appeared first on The OTRS Blog.
Inform Rocket.Chat users about ticket events

$
0
0

Many of my customers are using Rocket.Chat for their internal team chats. Last week I had a customer, who asked me if it’s possible to get a notification in their Rocket.Chat if there’s a new ticket in OTRS. I call this integration “Rocket.ChatConnector”.

The answer is… YES!

In the first part of a smaller blog article series, I’ll show you how to post messages in Rocket.Chat channels.

Like in former blog posts, there are several requirements for this HowTo:

  • running OTRS 6.0.x system
  • running RocketChat system

OTRS Requirements for this HowTo:

OTRS Framework

  • at least OTRS 6.0.x

OTRS Packages

You need the following OTRS Feature Add-on:

  • OTRSTicketInvoker
(Adds new invoker for TicketCreate and TicketUpdate in the GenericInterface.)

Third Party Software

You need this third-party software:

  • XML::Simple
  • XML::LibXML
  • XML::LibXSLT

Rocket.Chat Requirements for this HowTo:

  • a working Rocket.Chat (I’m using RocketChat 0.64.1)

Prepare Rocket.Chat for the integration

Go to Administration -> Integration and click on “New integration” in the right upper corner and click on “Incoming WebHook”

I’ve attached the configuration of my webhook:

rocketchatconnector preparing incoming webhook 1rocketchatconnector preparing incoming webhook 1

If you want, you can send the example JSON string to your incoming webhook with a local REST client. I’m using “Boomerang” which is an addon for Google Chrome.

rocketchatconnector webhook request


The answer is a simple “success”: truerocketchatconnector webhook answer

That’s all regarding the Rocket.Chat preparation. Let’s continue with OTRS.

Configuring the Rocket.ChatConnector on OTRS side

At first, we’ve to create a new web service. I’ll call it “Rocket.ChatConnector”.

rocketchatconnector OTRS general config

Afterwards, we need a new invoker. Attached you’ll find my config:

rocketchatconnector OTRS invoker config

The most important part is the XSLT mapping. The following example is tested and working:

rocketchatconnector OTRS invoker xsltXmapping

The last part for the invoker is the used event trigger. Because I only want to inform my users if there’s a new ticket with a very high priority, I’m using the “TicketCreate” event with a condition (Priority = 5 very high):

rocketchatconnector OTRS invoker event trigger

That’s all for the invoker configuration. The next part is the configuration of the transport. I’m using a small workaround to make the integration possible. My token in Rocket.Chat is “9HHhoQYYEo2unZQrm/e4tWQgxcKkZdryfcMA325unkNrC2R6JPSmJXtuknhbQ4TYZh”.  I’ve added the first part until the “/” to my endpoint address and the second part including the “/” I’ve added to the controller mapping. Don’t forget to set “POST” as request command.

rocketchatconnector OTRS transport config

Apply all changes. Congratulations! You’re done with the first part.

Testing the Rocket.ChatConnector

Let’s test our new web service. Create a new ticket with a priority = 5 very high and see if the invoker is triggered:

rocketchatconnector OTRS create ticket


The output in the OTRS debugger should look like the following:

rocketchatconnector OTRS debug outputBecause of the received JSON data from Rocket.Chat, we should also see the message now in our RocketChat channel

rocketchatconnector OTRS rocketchat message

More information about the Rocket.Chat REST API

You can also use other resources which are provided by the RocketChat REST API.

Please go to the following website, if you need more information: https://rocket.chat/docs/developer-guides/rest-api/

The post Inform Rocket.Chat users about ticket events appeared first on The OTRS Blog.

Inform Threema contacts about ticket events

$
0
0

From time to time I missed the possibility to inform agents via Threema about ticket events. Last week I had a customer from the cybersecurity sector, who needs the possibility to inform agents via Threema. Because I really like this use case, I want to show you how you can build such a “ThreemaConnector”.

The first step is to create an account for the Threema Gateway (https://gateway.threema.ch/en).

ThreemaConnector Register Account

Afterward you must request a new Threema ID. Pay attention because there are two types of Threema IDs:

ThreemaConnector Request ThreemaID

  • Basic
    • The private key will be generated and stored by Threema
    • Messages can be sent
    • Messages cannot be received
  • End-to-End
    • The private key will be generated and stored by the customer
    • Messages can be sent and received, including delivery reports (delivered, read, acknowledged).


In this blog article, I’m using the Basic Threema ID.  Later I’ll also show you how to receive Threema messages in OTRS. :-)

After you registered your Threema ID and received your confirmation email, we can start with our ThreemaConnector in OTRS. As usual, there are some requirements:

OTRS Requirements for this HowTo

OTRS Framework

  • at least OTRS 6.0.x

OTRS Packages

You need the following OTRS Feature Add-On:

  • OTRSTicketInvoker
(Adds new invoker for TicketCreate and TicketUpdate in the GenericInterface.)

Third Party Software

You need this third-party software:

  • XML::Simple
  • XML::LibXML
  • XML::LibXSLT

Configure the ThreemaConnector in OTRS

Now we can start to configure our ThreemaConnector. The first task is to create a new web service in OTRS.

ThreemaConnector Webservice config

Now we can continue with our invoker(s). I’m saying invokers because we need one invoker per recipient.

Let’s start with the configuration for the invoker “NotifyViaThreema”:

ThreemaConnector Invoker config 1

The most important part is the XSLT mapping and the event trigger for this invoker. You can use my XSLT mapping:

ThreemaConnector Invoker XSLT

Because I don’t want to send a message every time when a ticket is created, I define a condition for this invoker:

ThreemaConnector Invoker Trigger_config

The last step is the configuration of the network transport. The Threema API is expecting everything as parameters. Because of this, we have to work with variables:

ThreemaConnector Transport config

That’s all! Now we’re ready to start with our tests. At first we need a new ticket with a priority = 5 very high (my condition for the invoker).

ThreemaConnector Testticket

After ticket creation, we should receive a Threema message. As an alternative we can also check the debug logs of our web service:

ThreemaConnector Debug log

And on the recipient’s cell phone:

ThreemaConnector Message

The post Inform Threema contacts about ticket events appeared first on The OTRS Blog.
Automatically Detect the Language of Emails

$
0
0

I think everyone of you have asked yourself the question if it’s possible to automatically dispatch tickets into language-specific queues. This might be useful if you have location-based sales departments/support departments a.s.o. So keep on reading, because I want to show you how to build such a “LanguageConnector”. In part 1 of this small blog article series, I want to show you how to set up the web service. If you’re looking for part 2, you can find it here.

Last week I discovered a useful third-party provider, which makes it possible! The name of this provider is “Language Detection API“.

We have some pre-requirements:

  1. Go to https://www.detectlanguage.com and register a new account
  2. Choose a plan. I’m using the “Free” plan for this example
  3. Note your API key. You can also find it in your Dashboard

LanguageConnector Dashboard

OTRS Requirements for this HowTo

OTRS Framework

  • at least OTRS 6.0.x

OTRS Packages

You need the following OTRS Feature Add-On:

  • OTRSTicketInvoker
(Adds new invoker for TicketCreate and TicketUpdate in the GenericInterface.)

Third Party Software

You need this third-party software:

  • XML::Simple
  • XML::LibXML
  • XML::LibXSLT

Configuring the LanguageConnector in OTRS

As always we need a new web service in OTRS. Call it “LanguageConnector”:

LanguageConnector General config

Now we need a new invoker, to send requests to Language Detection:

LanguageConnector Invoker config

As you can see I removed everything, except the article body from my outgoing request data, because I want to keep my payload small.

The next point is the XSLT mapping for our outgoing request and incoming response data:

Outgoing XSLT mapping:

LanguageConnector Invoker XSLT outgoingIncoming XSLT mapping:

LanguageConnector Invoker XSLT incoming

The last point for the invoker is the used event trigger. For testing purposes I’m using “TicketLockUpdate”, but using “TicketCreate” event makes more sense in productive environments:

LanguageConnector Invoker config 1

Next point is to configure the network transport. It’s an easy job:

LanguageConnector transport config

As written in Language Detection API, you can use your API key as username and a password which can be empty or any value.

Let’s continue with our tests.

Testing the LanguageConnector

Depending on your configured event trigger for the invoker, please create a new ticket or (as I’m doing) lock the ticket to yourself. You should now see something similar in the web service debug log:

LanguageConnector debug log

In the ticket history, we can now see that the value was stored in the dynamic field “Language”:

LanguageConnector changed dyn field

More information about the Language Detection API

Please go to the following website, if you need more information: https://detectlanguage.com/documentation

The post Automatically Detect the Language of Emails appeared first on The OTRS Blog.
Event based ticket movement via web service

$
0
0

Let’s continue with our use case from last week. In part 1 we build the pre-requirement for this web service. For sure this can also be realised with another OTRS built-in functionality called GenericAgent, but do you really want to build one GenericAgent per language? Because I really want to avoid this I’m using the OTRSConnector. This has several benefits:

  1. The administration is much easier
  2. A possible performance impact is much lower

So let’s start!

OTRS Requirements for this HowTo

OTRS Framework

  • at least OTRS 6.0.x

OTRS Packages

You need the following OTRS Feature Add-On:

  • OTRSTicketInvoker
(Adds new invoker for TicketCreate and TicketUpdate in the GenericInterface.)

Third Party Software

You need this third-party software:

  • XML::Simple
  • XML::LibXML
  • XML::LibXSLT

Configuring the provider for the OTRSConnector

As usual the general configuration should look like the following:

OTRSConnector General config

In our new web service we need a provider and a requester (invoker). Let’s start with the provider, because it’s the easier one. Add a new operation “Ticket::TicketUpdate” and simply call it “TicketUpdate”. We don’t need an incoming mapping.

OTRSConnector provider config

The last point for the provider part is the configuration of the network transport. Define a valid route mapping and a request method for the provider.

OTRSConnector provider transport config

That’s all for the provider side. Let’s continue with our invoker!


Configuring the invoker for the OTRSConnector

Now we’ll configure the “magic”. Create a new invoker of type “Ticket::TicketUpdate” and include at least the TicketNumber and the dynamic field “Language” in your outgoing request data:

OTRSConnector invoker config

For our outgoing XSLT mapping, you can use my example:

OTRSConnector invoker outgoing mapping

The last part is the used event trigger. I want to trigger my invoker, if the dynamic field “Language” is udpated:

OTRSConnector invoker config1

The last part is the configuration of the network transport. The most important here is the controller mapping, because this needs to be the same as in the configuration of our provider. Otherwise you’ll receive errors.

OTRSConnector invoker transport config

Testing the OTRSConnector

Depending on your configured event trigger for the invoker, please trigger at first the LanguageConnector and wait until the dynamic field “Language” is populated. You should now see something similiar in the web service debug log:

OTRSConnector debug log

You’ll now see in the ticket history, that the queue was changed by our webservice user:

OTRSConnector ticket history

More information about the OTRS  API

Please go to the following website, if you need more information: http://doc.otrs.com/doc/api/otrs/stable/Perl/Kernel/GenericInterface/Operation/Ticket/TicketUpdate.pm.html


The post Event based ticket movement via web service appeared first on The OTRS Blog.
Use the right language in notifications

$
0
0

In may 2018 I showed you how to detect the language of an email which was sent to OTRS. Now I want to use this information to sent an auto response after ticket creation to the customer user in his language. Conveniently this is possible with built-in OTRS possibilites.We only need some new ticket notifications.

So let’s create them!

Go to Admin -> Ticket Notifications and a add a new notification with the following configuration:

general notification configuration

We have to listen to the event “TicketDynamicFieldUpdate_Language”, because we want to inform the customer in his language.

ticket filter for notificationsThis notification should only be send if the language is german.

recipients for notificationsWe only want to inform the customer user.

notification textLast but not least, the notification text.

Finally we can do some tests. Write an email in german to your OTRS. You should receive the german notification.

testing notifications

The post Use the right language in notifications appeared first on The OTRS Blog.
Automatically detect the gender of your customer user

$
0
0

I think everyone of you have asked yourself the question (especially the german OTRS administrators), if it’s possible to automatically detect the gender of your customer users. This might be useful if the gender is missing in your customer user backend or someone is writing you an email, who is not stored in your backend. So keep on reading, because I want to show you how to build such a “GenderAPIConnector”. In part 1 of this small blog article series I want to show you how to set up the web service to automatically check the gender of the sender.

Important note:

Keep in mind, the OTRS Blog should only show you the technical possibilities you have with OTRS, the OTRS API and other tools/services. Based on the new General Data Protection Regulation, which is enforced since may 2018, you should think about if you really need the gender of a person for your service management.

Last week I discovered another useful third-party provider, which makes it possible! The name of this provider is “Gender API“.

We have some pre-requirements before we can start:

  1. Go to https://gender-api.com and register a new account
  2. After registration you’ll receive 500 credits, but you can buy more
  3. Note your API key. You can also find it in your Overview (at the end of the site)

GenderAPIConnector Overview

OTRS Requirements for this HowTo

OTRS Framework

  • at least OTRS 6.0.x

OTRS Packages

You need the following OTRS Feature Add-On:

  • OTRSTicketInvoker
(Adds new invoker for TicketCreate and TicketUpdate in the GenericInterface.)

Third Party Software

You need this third-party software:

  • XML::Simple
  • XML::LibXML
  • XML::LibXSLT

Dynamic fields in OTRS

  • Firstname – of type text – to store the firstname of the customer user
  • Gender – of type text – to store the gender (response) from GenderAPI

Configuring the GenderAPIConnector in OTRS

As always we need a new web service in OTRS. Call it “GenderAPIConnector”:

GenderAPIConnector General Config

Let’s continue with our invoker. The name for my invoker is “detectgender”. Because I want to reduce my payload, I’m only using the dynamic field “Firstname” in my outgoing request data. I also use “XSLT” for my outgoing an incoming mapping:

GenderAPIConnector Invoker Config

My outgoing XSLT mapping is the following:

GenderAPIConnector Invoker XSLT outgoing

Because the invoker will receive an answer immediately, we need a XSLT mapping for the incoming response data. You can use the following example:

GenderAPIConnector Invoker XSLT incoming

The response should be stored in the dynamic field “Gender”. We also have to tell the invoker, when he should be triggered towards GenderAPI. Because of this I’m using the event “TicketDynamicFieldUpdate_Firstname”:

GenderAPIConnector General Config 1

The last point for my first GenderAPI example is the configuration of the transport. Pay attention to the controller mapping, because GenderAPI is expecting everything as query params (also the API key). The valid request method for this controller is GET. If you do the same than I did, it should work as expected.

GenderAPIConnector Transport ConfigThat’s all for this invoker. Let’s start our tests.

Testing the GenderAPIConnector

Depending on your configured event trigger for the invoker, please create a new ticket or (as I’m doing) lock the ticket to yourself. You should now see something similiar in the web service debug log:

GenderAPIConnector Debug log

In the ticket history of the specific ticket we now see the value for the gender:

GenderAPIConnector ticket history


What can we now do with this information? I’ll show you next time.

More information about the Gender API

Please go to the following website, if you need more information: https://gender-api.com/en/api-docs

The post Automatically detect the gender of your customer user appeared first on The OTRS Blog.
Check IP information via web service

$
0
0

STORM powered by OTRS” is used in IT security departments and companies for long time due to the well documented code of OTRS and a huge background in the CERT area.

In one of my recent projects the team wanted to simplify their investigation activities. We decided to use an external API to request information for specific data we send. Until now they’re copying this information manually into STORM.

In part 1 of this small blog article series, I want to show you how to request additional information for a IP which triggered a security incident in an external system. Because I’m using the NeutrinoAPI, I’m calling this web service NeutrinoAPIConnector.

We have some pre-requirements:

  1. Go to https://www.neutrinoapi.com/ and register a new account
  2. Choose a plan. I’m using the “Free” plan for this example
  3. Note your API key. You can also change it later, if you’ve forgotten to note it.

My customer is using “STORM powered by OTRS” with the OTRS Feature Add-On “OTRSTicketInvoker”.

In addition we need two dynamic fields in OTRS:

  • IPAddress – Text – used to specify which IP should be checked
  • IPAddressInformation – TextArea – to store the response of NeutrinoAPI

Configuring the NeutrinoAPIConnector in STORM

As always we need a new web service in STORM. Call it “NeutrinoAPIConnector”:

NeutrinoAPIConnector general config

Now we need a new invoker, to send requests to NeutrinoAPI:

NeutrinoAPIConnector GetIPInformation general config

As you can see I removed everything, except the dynamic field “IPAddress” from my outgoing request data, because I want to keep my payload small.

The next point is the XSLT mapping for our outgoing request and incoming response data:

Outgoing XSLT mapping:

NeutrinoAPIConnector GetIPInformation Outgoing Mapping

Incoming XSLT mapping:

NeutrinoAPIConnector GetIPInformation Incoming Mapping


We should define the dynamic field “IPAddressInformation” to store the NeutrinoAPI response. The last point for the invoker is the used event trigger. I’m using the event “TicketDynamicFieldUpdate_IPAddress”, because it makes most sense in my scenario:

NeutrinoAPIConnector GetIPInformation Response and Trigger

Next point is to configure the network transport. It’s an easy job:

NeutrinoAPIConnector GetIPInformation Transport

The used endpoint is “https://neutrinoapi.com”, the controller mapping “/ip-info” and the request method is “POST”. You’ll also find this information in the NeutrinoAPI API documentation.

Testing the NeutrinoAPIConnector

Depending on your configured event trigger for the invoker, use a valid IP address in the dynamic field “IPAddress”. You should now see something similar in the web service debug log:

NeutrinoAPIConnector GetIPInformation Debugger

In the ticket history, we can now see that the value was stored in the dynamic field “IPAddressInformation”:

NeutrinoAPIConnector GetIPInformation History

More information about the Language Detection API

Please go to the following website, if you need more information: NeutrinoAPI API documentation.


The post Check IP information via web service appeared first on The OTRS Blog.
Adding IP information to Ticket as new article

$
0
0

In one of my last blog articles I told you how to request IP information from NeutrinoAPI. At the moment this information is only stored in the dynamic field “IPAddressInformation” and is overwritten every time, when you change the dynamic field “IPAddress” for a ticket.Because it can happen that the IP address changed more than one time, we should store the content of “IPAddressInformation” in an article of the ticket.

In this blog article I’m extending the “OTRSConnector” and add a new invoker to this already existing web service.

Let’s start!

At first we need a new invoker for the “OTRSConnector” like the one I’m using: “AddIPInformationToTicket”.

For our outgoing request data it’s mandatory to use at least the TicketNumber and the dynamic field “IPAddressInformation”. All other fields are optional.

Invoker config

The next step is our XSLT mapping. As you can see, we add a new article to the ticket and use the content of the dynamic field “IPAddressInformation”:

Invoker XSLT

The last point for the configuration of the invoker is the event trigger. From my point of view selecting the event “TicketDynamicFieldUpdate_IPAddressInformation” is the only one which makes sense.

Invoker Trigger

The last part for this small change is to edit the transport configuration. We’re using the “TicketUpdate” operation for this use case.

From now on, the received IP address information from NeutrinoAPI, will be added as a new article to the related ticket.

Test

The post Adding IP information to Ticket as new article appeared first on The OTRS Blog.

Use travel security information in your travel processes

$
0
0

STORM powered by OTRS” is used in security departments and companies for long time due to the well documented code of OTRS and a huge background in the CERT area.

In one of my recent projects the team wanted to simplify their travel security process. An employee should start a process, where he has to specify to travel country and some other important values. Based on the travel country, OTRS should display possible travel security warnings, if there are some. We decided to use an external API to request information for the country the employee wants to travel. Until now they’re copying this information manually into STORM.

After some research we decided that we want to use the API of https://www.reisewarnung.net for this use case.

There are no special pre-requirements regarding the API. So we don’t need an account or have to pay money to use this API.

My customer is using “STORM powered by OTRS” with the OTRS Feature Add-On “OTRSTicketInvoker”.

In addition we need to add some dynamic fields in STORM to store the response data:

  • Country – Dropdown – with ISO3166-1 compliant Alpha-2 country codes (see https://en.wikipedia.org/wiki/ISO_3166-1 for possible values)
  • TravelRating – Text – to store the travel rating
  • TravelLastUpdate – Text – to store the last update time (will be used in another use case)
  • TravelCountryGerman – Text – to store the travel country in german
  • TravelContinentGerman – Text – to store the continent in german
  • TravelURLDetailsGerman – Text – to store an URL for additional information
  • TravelAdviceGerman – Text – to store the travel advice in german
  • TravelCountryEnglish – Text – to store the travel country in english
  • TravelContinentEnglish – Text – to store the continent in english
  • TravelURLDetailsEnglish – Text – to store an URL for additional information
  • TravelAdviceEnglish – Text – to store the travel advice in english

Configuration of the new “STORM powered by OTRS” web service

As always we need a new web service in STORM. I Call it “TravelSecurityConnector”:

travelsecurityconnector general config

Now we need a new invoker, to send requests to Reisewarnungen.net:

travelsecurityconnector invoker config

As you can see I removed everything, except the dynamic field “Country” from my outgoing request data, because I want to keep my payload small.

The next point is the XSLT mapping for our outgoing request and incoming response data:

Outgoing XSLT mapping:

travelsecurityconnector outgoing xslt

Incoming XSLT mapping:

travelsecurityconnector incoming xslt

Now you see, why we need so many dynamic fields. Every single value is stored in another dynamic field. It’s also possible to store this values into one dynamic field of type “TextArea”. The last point for the invoker is the used event trigger. I’m using the event “TicketDynamicFieldUpdate_Country”, because it makes most sense in my scenario. In addition we need to select the other dynamic fields (TravelRating, TravelLastUpdate, TravelCountryGerman, TravelContinentGerman, TravelURLDetailsGerman, TravelAdviceGerman, TravelCountryEnglish, TravelContinentEnglish, TravelURLDetailsEnglish, TravelAdviceEnglish) in the “ticket dynamic fields” dropdown to store the response data:

travelsecurityconnector invoker config part2

Next point is to configure the network transport. It’s an easy job:

travelsecurityconnector transport config

The used endpoint is “https://www.reisewarnung.net”, the controller mapping “/api?country=:Country” and the request method is “GET”. You’ll also find this information in the Reisewarnungen.net API documentation.

Testing the TravelSecurityConnector

Depending on your configured event trigger for the invoker, use a valid IP address in the dynamic field “IPAddress”. You should now see something similar in the web service debug log:

travelsecurityconnector debugger 1travelsecurityconnector debugger 2

I combined this connector with the “OTRSConnector“, which adds the travel security information to the ticket, I’m working with:

travelsecurityconnector ticketzoom

More information about the Reisewarnungen.net API

Please go to the following website, if you need more information: https://www.reisewarnung.net/en/about-the-api

The post Use travel security information in your travel processes appeared first on The OTRS Blog.
Fetch CVE data and use them in your processes

$
0
0

As you may have noticed, OTRS Group has launched “STORM powered by OTRS” in the last year, which is used in IT security departments and companies for long time due to the well documented code of OTRS and a huge background in the CERT area. One of the key facts of STORM are the special consultants with a military / IT Security background for several years.

One of the features of “STORM powered by OTRS” is the information floater which was described here. To display information, this information floater is sufficient, but what will happen if you have to work with these data in a (process) ticket?

In part 1 of this small blog article series, I will show you how to request additional information for a CVE from CIRCL. I’m calling this web service CIRCLCVEConnector.

I’m using “STORM powered by OTRS” with the OTRS Feature Add-On “OTRSTicketInvoker”.

In addition we need some dynamic fields in OTRS:

  • CVENumber – Text – used to specify the CVE number
  • WSCVEID – Text – the received CVE ID from CIRCL
  • WSCVESummary – TextArea – a short summary which is part of every CVE
  • WSCVEReferences – TextArea – references for the CVE
  • WSCVEVulnerableConfigurations – TextArea – vulnerable configurations for the CVE
  • WSCVSS – Text – the CVSS score of the CVE
  • WSCWE – Text – Common Weakness Enumeration of the CVE
  • WSCapec – Text – Common Attach Pattern Enumeration and Classification for the CVE
  • WSPacketStorm – TextArea – packetstormsecurity.com reference
  • WSRefmap – TextArea – some more references
  • WSPublished – Text – the date when the CVE was published
  • WSModified – Text – the last modification date of the CVE
  • WSAllCVEInformationReceived – Text – A trigger for a later use case ;-)

Configuring the CIRCLCVEConnector in STORM

As always we need a new web service in STORM. Call it “CIRCLCVEConnector”:

CIRCLCVEConnector General config

A new invoker is needed:

CIRCLCVEConnector Invoker config 1

As you can see I removed everything, except the dynamic field “CVENumber” from my outgoing request data, because I want to keep my payload small.

The next point is the XSLT mapping for our outgoing request and incoming response data:

Outgoing XSLT mapping:

CIRCLCVEConnector Outgoing XSLT

Incoming XSLT mapping:


CIRCLCVEConnector Incoming XSLTHere’s the complete XSL stylesheet:

<?xml version="1.0" encoding="UTF-8"?>
<xsl:stylesheet version="1.0"
xmlns:xsl="http://www.w3.org/1999/XSL/Transform"
xmlns:date="http://exslt.org/dates-and-times"
extension-element-prefixes="date">
<xsl:output method="xml" encoding="utf-8" indent="yes"/>
<xsl:variable name="id" select="//RootElement/id "/>
<xsl:variable name="summary" select="//RootElement/summary"/>
<xsl:variable name="references" select="//references"/>
<xsl:variable name="vulnerable_configurations" select="//vulnerable_configuration"/>
<xsl:variable name="cvss" select="//cvss"/>
<xsl:variable name="cwe" select="//cwe"/>
<xsl:variable name="capec" select="//capec"/>
<xsl:variable name="packetstorm" select="//packetstorm"/>
<xsl:variable name="refmap" select="//refmap"/>
<xsl:variable name="published" select="//RootElement/Published"/>
<xsl:variable name="modified" select="//RootElement/Modified"/>

<xsl:template match="RootElement">
<xsl:copy>
<Ticket>
<DynamicField>
<Name>WSCVEID</Name>
<Value><xsl:value-of select="$id"/></Value>
</DynamicField>
<xsl:choose>
<xsl:when test="$summary = ''"></xsl:when>
<xsl:otherwise>
<DynamicField>
<Name>WSCVESummary</Name>
<Value><xsl:value-of select="$summary"/></Value>
</DynamicField>
</xsl:otherwise>
</xsl:choose>
<xsl:choose>
<xsl:when test="$references = ''"></xsl:when>
<xsl:otherwise>
<DynamicField>
<Name>WSCVEReferences</Name>
<Value>
<xsl:for-each select="$references">
<xsl:value-of select="."/><xsl:text>&#xA;</xsl:text></xsl:for-each></Value>
</DynamicField>
</xsl:otherwise>
</xsl:choose>
<xsl:choose>
<xsl:when test="$vulnerable_configurations = ''"></xsl:when>
<xsl:otherwise>
<DynamicField>
<Name>WSCVEVulnerableConfigurations</Name>
<Value>
<xsl:for-each select="$vulnerable_configurations">
<xsl:value-of select="id"/><xsl:text>&#xA;</xsl:text>
</xsl:for-each>
</Value>
</DynamicField>
</xsl:otherwise>
</xsl:choose>
<xsl:choose>
<xsl:when test="$cvss = ''"></xsl:when>
<xsl:otherwise>
<DynamicField>
<Name>WSCVSS</Name>
<Value>
<xsl:value-of select="$cvss"/>
</Value>
</DynamicField>
</xsl:otherwise>
</xsl:choose>
<xsl:choose>
<xsl:when test="$cwe = ''"></xsl:when>
<xsl:otherwise>
<DynamicField>
<Name>WSCWE</Name>
<Value>
<xsl:value-of select="$cwe"/>
</Value>
</DynamicField>
</xsl:otherwise>
</xsl:choose>
<xsl:choose>
<xsl:when test="$capec = ''"></xsl:when>
<xsl:otherwise>
<DynamicField>
<Name>WSCapec</Name>
<Value>
<xsl:for-each select="$capec">
<xsl:value-of select="name"/><xsl:text>&#xA;</xsl:text>
</xsl:for-each>
</Value>
</DynamicField>
</xsl:otherwise>
</xsl:choose>
<xsl:choose>
<xsl:when test="$capec = ''"></xsl:when>
<xsl:otherwise>
<DynamicField>
<Name>WSPacketStorm</Name>
<Value>
<xsl:for-each select="$packetstorm">
Title: <xsl:value-of select="title"/>
Source: <xsl:value-of select="data_source"/>
ID: <xsl:value-of select="id"/>
Last seen: <xsl:value-of select="last_seen"/>>
Published: <xsl:value-of select="published"/>
Reporter: <xsl:value-of select="reporter"/>
Source: <xsl:value-of select="source"/>
</xsl:for-each>
</Value>
</DynamicField>
</xsl:otherwise>
</xsl:choose>
<xsl:choose>
<xsl:when test="$refmap = ''"></xsl:when>
<xsl:otherwise>
<DynamicField>
<Name>WSRefmap</Name>
<Value>
<xsl:for-each select="refmap">
Title: <xsl:value-of select="title"/>
Source: <xsl:value-of select="data_source"/>
ID: <xsl:value-of select="id"/>
Last seen: <xsl:value-of select="last_seen"/>>
Published: <xsl:value-of select="published"/>
Reporter: <xsl:value-of select="reporter"/>
Source: <xsl:value-of select="source"/>
</xsl:for-each>
</Value>
</DynamicField>
</xsl:otherwise>
</xsl:choose>
<xsl:choose>
<xsl:when test="$published = ''"></xsl:when>
<xsl:otherwise>
<DynamicField>
<Name>WSPublished</Name>
<Value>
<xsl:value-of select="$published"/>
</Value>
</DynamicField>
</xsl:otherwise>
</xsl:choose>
<xsl:choose>
<xsl:when test="$modified = ''"></xsl:when>
<xsl:otherwise>
<DynamicField>
<Name>WSModified</Name>
<Value>
<xsl:value-of select="$modified"/>
</Value>
</DynamicField>
</xsl:otherwise>
</xsl:choose>
<DynamicField>
<Name>WSAllCVEInformationReceived</Name>
<Value>Yes</Value>
</DynamicField>
</Ticket>
</xsl:copy>
</xsl:template>
</xsl:stylesheet>


We should define the dynamic fields “WSCVEID, WSCVESummary, WSCVEReferences, WSCVEVulnerableConfigurations, WSCVSS, WSCWE, WSCapec, WSPacketStorm, WSRefmap, WSPublished, WSModified, WSAllCVEInformationReceived” as ticket dynamic fields in the web service, to store the CIRCLE CVE response. The last point for the invoker is the used event trigger. I’m using the event “TicketDynamicFieldUpdate_CVENumber”, because it makes most sense in my scenario:

CIRCLCVEConnector Invoker config 2

Next point is to configure the network transport. It’s an easy job:

CIRCLCVEConnector Transport

The used endpoint is “https://cve.circl.lu“, the controller mapping “/api/cve/:CVE” and the request method is “GET”. You’ll also find this information in the https://cve.circl.lu/api/.

Testing the CIRCLCVEConnector

Depending on your configured event trigger for the invoker, use a valid CVE number in the dynamic field “CVENumber”. You should now see something similar in the web service debug log:

CIRCLCVEConnector Debug

In the ticket history, we can now see that the response values are stored in the dynamic fields:

CIRCLCVEConnector History

More information about the CIRCL API

Please go to the following website, if you need more information: https://cve.circl.lu/api/.


The post Fetch CVE data and use them in your processes appeared first on The OTRS Blog.
Send E-Mails via Web Service

$
0
0

One of the key features of “STORM powered by OTRS” is automizing daily manual tasks. Some months ago I was with a CERT team and they want to create & update tickets in STORM and afterwards send emails to the recipients. To solve this requirement we used the STORM exclusive functionality “ArticleSend”.

The best thing is, that it’s also working with your web service operations which already exists in your STORM system.

If you have a STORM system, take a REST Client (e.g.: Boomerang) and send one the following JSON strings to your TicketCreate / TicketUpdate endpoint:

Example for TicketCreate with ArticleSend:

{
"Ticket": {
"Title": "Some ticket title",
"Queue": "<a valid queue name>",
"Lock": "unlock",
"Type": "<a valid ticket type>",
"State": "<a valid state e.g.: Incident>",
"Priority": "<a valid ticket priority e.g.: 3 normal>",
"Owner": "<a valid STORM user e.g.: root@localhost>",
"CustomerUser": "your@recipient.com"
},
"Article": {
"To": "your@recipient.com",
"ContentType": "text/html; charset=UTF8",
"CommunicationChannel": "Email",
"SenderType": "agent",
"Subject": "ArticleSend via REST",
"Body": "Some text send via REST",
"IsVisibleForCustomer": "1"
},
"UserLogin": "<Your_web_service_user>",
"Password": "<Password>"
}

Example for TicketUpdate with ArticleSend:

{
"Article": {
"To": "your@recipient.com",
"ContentType": "text/html; charset=UTF8",
"CommunicationChannel": "Email",
"SenderType": "agent",
"Subject": "ArticleSend via REST",
"Body": "Some text send via REST",
"IsVisibleForCustomer": "1"
},
"UserLogin": "<Your_web_service_user>",
"Password": "<Password>",
"TicketID": "<TicketID>",
}

I would really like to see your usecases, so please leave a comment.

The post Send E-Mails via Web Service appeared first on The OTRS Blog.
Post ticket events to Slack channels

$
0
0

During my vacation I thought about new integration use cases I can show you. Because I’m also evaluating Phantom at the moment and was invited to join their Slack community, I thought this would be a nice use case. So let’s start with our “SlackConnector”.

Like in former blog posts, there are several requirements for this HowTo:

  • running OTRS 6.0.x system
  • a valid Slack workspace

Prepare Slack for the integration

Follow the instructions and create a new incoming webhook.

Configure the SlackConnector on OTRS side

At first, we’ve to create the new web service.

SlackConnector General config

Afterwards, we need a new invoker. Attached you’ll find the first part of my config:

SlackConnector Invoker Config 1

The most important part is (as always) the XSLT mapping. The following example is tested and working:

SlackConnector XSLT mapping

Here’s the XSL stylesheet:

<?xml version="1.0" encoding="UTF-8" ?>
<xsl:transform xmlns:xsl="http://www.w3.org/1999/XSL/Transform" version="2.0">
<xsl:output method="xml" doctype-public="XSLT-compat" omit-xml-declaration="yes" encoding="UTF-8" indent="yes" />

<xsl:template match="RootElement">
<xsl:copy>
<text>New Ticket [Ticket#<xsl:value-of select="//TicketNumber"/>] created!
Title: <xsl:value-of select="//Ticket/Title"/>
Priority: <xsl:value-of select="//Ticket/Priority"/>
</text>
<attachments>
<title>https://storm-demo.managed-otrs.com/otrs/index.pl?Action=AgentTicketZoom;TicketID=<xsl:value-of select="//TicketID"/></title>
<title_link>https://storm-demo.managed-otrs.com/otrs/index.pl?Action=AgentTicketZoom;TicketID=<xsl:value-of select="//TicketID"/></title_link>
<text>Go to ticket to see more information!</text>
</attachments>
<attachments/>
</xsl:copy>
</xsl:template>
</xsl:transform>

The last part for the invoker is the used event trigger. Because I want to inform my Slack users every time when a new ticket is created, I’m using the “TicketCreate” event without any event filters:

SlackConnector Invoker Config 2

That’s all for the invoker configuration. The next part is the configuration of the transport. I’m using a small workaround to make the integration possible. My Slack token is “T0X829D7E/BBYH0BEE4/nAFuXxXxXxXxXxXxXxXxXxX2”.  I’ve added the first part until the “/” to my endpoint address and the second part including the “/” I added to the controller mapping. Don’t forget to set “POST” as request command.

SlackConnector Transport Config

Apply all changes. Congratulations! You’re done with the invoker.

Test the SlackConnector

Let’s test our new web service. Create a new ticket and see if the invoker is triggered:

SlackConnector Ticket


The output in the OTRS debugger should look like the following:

SlackConnector Debugger

Because of the received JSON data from Slack, we should also see the message now in our Slack channel

SlackConnector Slack

More information about the Slack REST API

You can also use other resources which are provided by the Slack REST API.

Please go to the following website, if you need more information: https://api.slack.com/web

The post Post ticket events to Slack channels appeared first on The OTRS Blog.
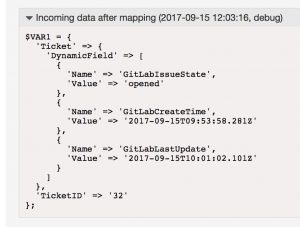
Bugzilla Connector: Empower Your Service Center.

$
0
0

Software Support and Bugzilla

Software has bugs!

This is nothing new. Your service department has to deal with this on a daily basis. When your software development team uses a bug tracking tool, it’s could very likely be Bugzilla. When tracking and reporting to product management about reliability and usability, it’s good to be on the same page.

Your service desk uses OTRS, because timely and transparent communication is a vital part of customer satisfaction, when bugs occur. Some questions come to mind:

  • How does your support team categorize the incident when creating the record?
  • How can we use the captured data to make the software better?
  • How to ensure that the data we provide is translatable, by our product manager, into something of value for development?

OTRS has a solution: Dynamic Field Web Service

As an OTRS customer, you have access to the one tool you need to connect all you services to your service center. The generic interface allows you to easily design an API which can consume valuable information from most any SOAP or REST source via an HTTP request. In this use case, let’s look at getting the PRODUCT an COMPONENT information from Bugzilla. Using this information, we can easily categorize incoming incidents for the product wich are developed and supported by our service center.

This will allow the service desk manager to report upon incidents based on the same categories and products which are in the Bugzilla tracking tool. The product manager is then empowered to better focus his development efforts on the areas which are the most painful for the customer. When new products and categories arrive, they will automatically be available for use by the service team.

Requirements:

OTRS:
This can be managed or OnPremise.

Bugzilla:
Bugzilla must be setup with Products and Components. We will use the public interface as documented in the chapter 6. WebService API Reference of the Bugzilla Manual.

OTRS Feature Add-ons:

  • OTRSDynamicFieldWebservice

Setup:

Web service:

One web service and two invokers are needed. One will call the product, and the second will use the input from the product to call the category.


Dynamic fields:

Two dynamic fields of type web services are required. One will store the product, and the other the category.

Configuration

Using the newly introduced web service operation Generic::PassThrough, it is now possible to configure a web service to pass it’s request data on to another function in OTRS. Currently this is used only for the dynamic fields of type web service.

Step 1 Configure the Web Service

You need to create a web service and add a network transport HTTP::REST under OTRS as requester.

Click save to continue.

Then add the invokers GetComponent and GetProduct Invokers using the Generic::PassThrough controller.

Go back and set the controller mappings in the network transport.

Notice that the controller mapping for GetComponent uses a variable :name. This is important later for the mapping.

Step 2 Configure the Mapping

We have to map the outgoing request, because we should not pass ticket data to the provider. We will only pass API specific parameters. The incoming requests must be mapped to the correct format for displaying in the drop down.

XLST Outbound Mapping (GetProduct)

This removes all ticket data and sends the parameter accessible which limits the return to only selectable products.

<?xml version="1.0" encoding="UTF-8"?>
<xsl:stylesheet version="1.0"
                xmlns:xsl="http://www.w3.org/1999/XSL/Transform">
    <xsl:template match="/">
        <RootElement>
            <type>
                accessible
            </type>
        </RootElement>
    </xsl:template>
</xsl:stylesheet>

XLST Inbound Mapping (GetProduct)

You do not need to specify the name of the dynamic field here, only it’s key and value. is_active limits to non-retired items. Notice we add the name of the product as the key and the value.

<?xml version="1.0" encoding="UTF-8"?>
<xsl:stylesheet version="1.0"
                xmlns:xsl="http://www.w3.org/1999/XSL/Transform">
    <xsl:template match="RootElement">
        <RootElement>
            <xsl:for-each select="products[is_active = '1']">
                <PossibleValue>
                    <Key>
                        <xsl:value-of select="name"/>
                    </Key>
                    <Value>
                        <xsl:value-of select="name"/>
                    </Value>
                </PossibleValue>
            </xsl:for-each>
        </RootElement>
    </xsl:template>
</xsl:stylesheet>

XLST Outbound Mapping (GetComponent)

Note we use the value of the FORM DATA to select the component. This means we must always use these two dynamic fields together in one screen of OTRS. The product field should always have a higher order and be selected first.

<?xml version="1.0" encoding="UTF-8"?>
<xsl:stylesheet version="1.0"
    xmlns:xsl="http://www.w3.org/1999/XSL/Transform"
    xmlns:date="http://exslt.org/dates-and-times"
    extension-element-prefixes="date">
    <xsl:output method="xml" encoding="utf-8" indent="yes"/>
    <xsl:template match="RootElement">
    <xsl:copy>
            <name>
                <xsl:value-of select="//Form/DynamicField/WebServiceBugsillaProduct"/>
            </name>
    </xsl:copy>
   </xsl:template>
</xsl:stylesheet>

XLST Inbound Mapping (GetComponent)

<xsl:stylesheet version="1.0"
                xmlns:xsl="http://www.w3.org/1999/XSL/Transform"
                xmlns:date="http://exslt.org/dates-and-times"
                extension-element-prefixes="date">
    <xsl:output method="xml" encoding="utf-8" indent="yes"/>
    <xsl:template match="RootElement">
        <xsl:copy>
            <xsl:for-each select="//products/components/name">
                <PossibleValue>
                    <Key>
                        <xsl:value-of select="."/>
                    </Key>
                    <Value>
                        <xsl:value-of select="."/>
                    </Value>
                </PossibleValue>
            </xsl:for-each>
        </xsl:copy>
    </xsl:template>
</xsl:stylesheet>

Step 3 Setup Dynamic Fields

We need two fields as described above. See an example of the configuration below. The key difference is the Invoker chosen. Note that the Field order should always be a lower number for the product field as for the category field. This makes sure that the product field is displayed first and components will trigger correctly

Create a field for the products and one for components.
Ensure to select the correct invoker for each field.

Step 4 Configure for use in the system.

Using the system configuration of OTRS, you can then add the two dynamic fields anywhere ticket data can be edited or reply are made. We will choose Ticket::Frontend::AgentTicketFreeText###DynamicField and add thees as well to Ticket::Frontend::AgentTicketZoom###DynamicField for ease of viewing.


Using then the Miscellaneous -> Free Text, you can then access the values for your dynamic fields via web service request.


Until next time,

((enjoy))

Shawn Beasley

The post Bugzilla Connector: Empower Your Service Center. appeared first on The OTRS Blog.
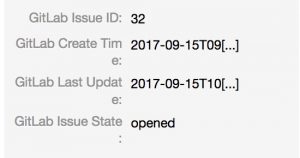
Viewing all 45 articles
Browse latest View live